Monday, January 31, 2011

update of flames of war and 28mm SYW


Not a lot has been done since last post the 24 Hungarians are a few steps on and the Flames of war one step i did one on the camo and it was so bad i have stop normally i have no trouble but this time i just hate the look so will repait that tank and start again. I only have four week before the competition


Friday, January 28, 2011

the weekend starts with more painting tanks and infantry


I started with undercoating 10 panzer IV tanks and 5 stugs i was going to spray them but when the box arrived no spray what a pain so back to the brush also started the next 24 infantry yesterday lunch time so have a long way to go but here are first pics shows that you should never be discourage and give up at this stage because it's amazing how as the layers are added the models come to life

these guys below are Hungarian syw Jos. Esterhazy Infantry
or should i say they will be.


Thursday, January 27, 2011

How to Paint Austrians syw Carlstadt Szluiner infantry

Well here we are again this time i'd like to explain how i painted these Carlstadt Szluiner light infantry which is part of a large Austrian Commission

 I start By basing the 24 figures on strips of card then undercoat spray paint them black
then i cut them into single squares for easy handling
!. the first thing i do is then a coat of Tallern flesh base coat


2. I then add a wash of orgrin flesh (photo two) 

3. the photo below show the skin with it's third layer colour Dawf flesh.
 leave some of the base coats showing through

photo 4 show the skin with another wash of Orgrin skin.
I do one final layer which i leave to later in the paint

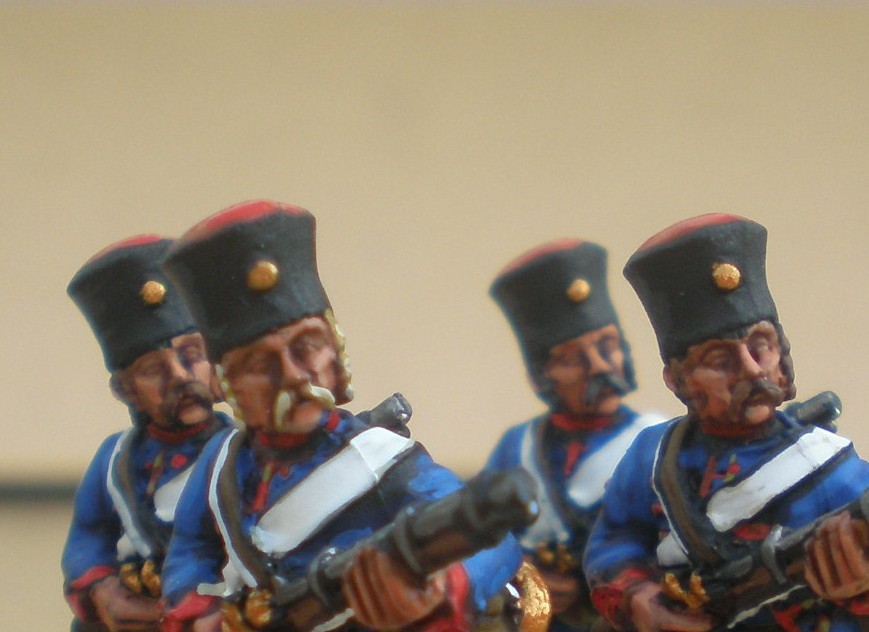
Photo 5 left figure shows first coat of Prussian blue paint out all black where this blue is
Right figure has second coat intense blue.
when painting this coat leave areas of first coat to show throught

you can see in this picture how i have left the bottom layer of Prussian blue

Photo 7. I this picture I have added the third layer of blue use sparingly paint on raised areas only
I've also painted bone white and burnt umber on the two belts scrortch earth on the gun wood these are all base coats. the reason for base coats is they give depth and the final colour will be stronger and more pleasing to the eye.

 Photo 8 Base coat of black red on the blanket
Photo 9
Here we have second coats going on Blood red over the base coat of black red leave small amounts of base coat white on the belt and leather brown on thin belt
 Photo 10. Scortched brown on hair german grey for black or bubonic brown for blond in this photo i've only done the first layer of hair.
    (Calthan brown orlondon grey bleached bone for second layer thin stripes)
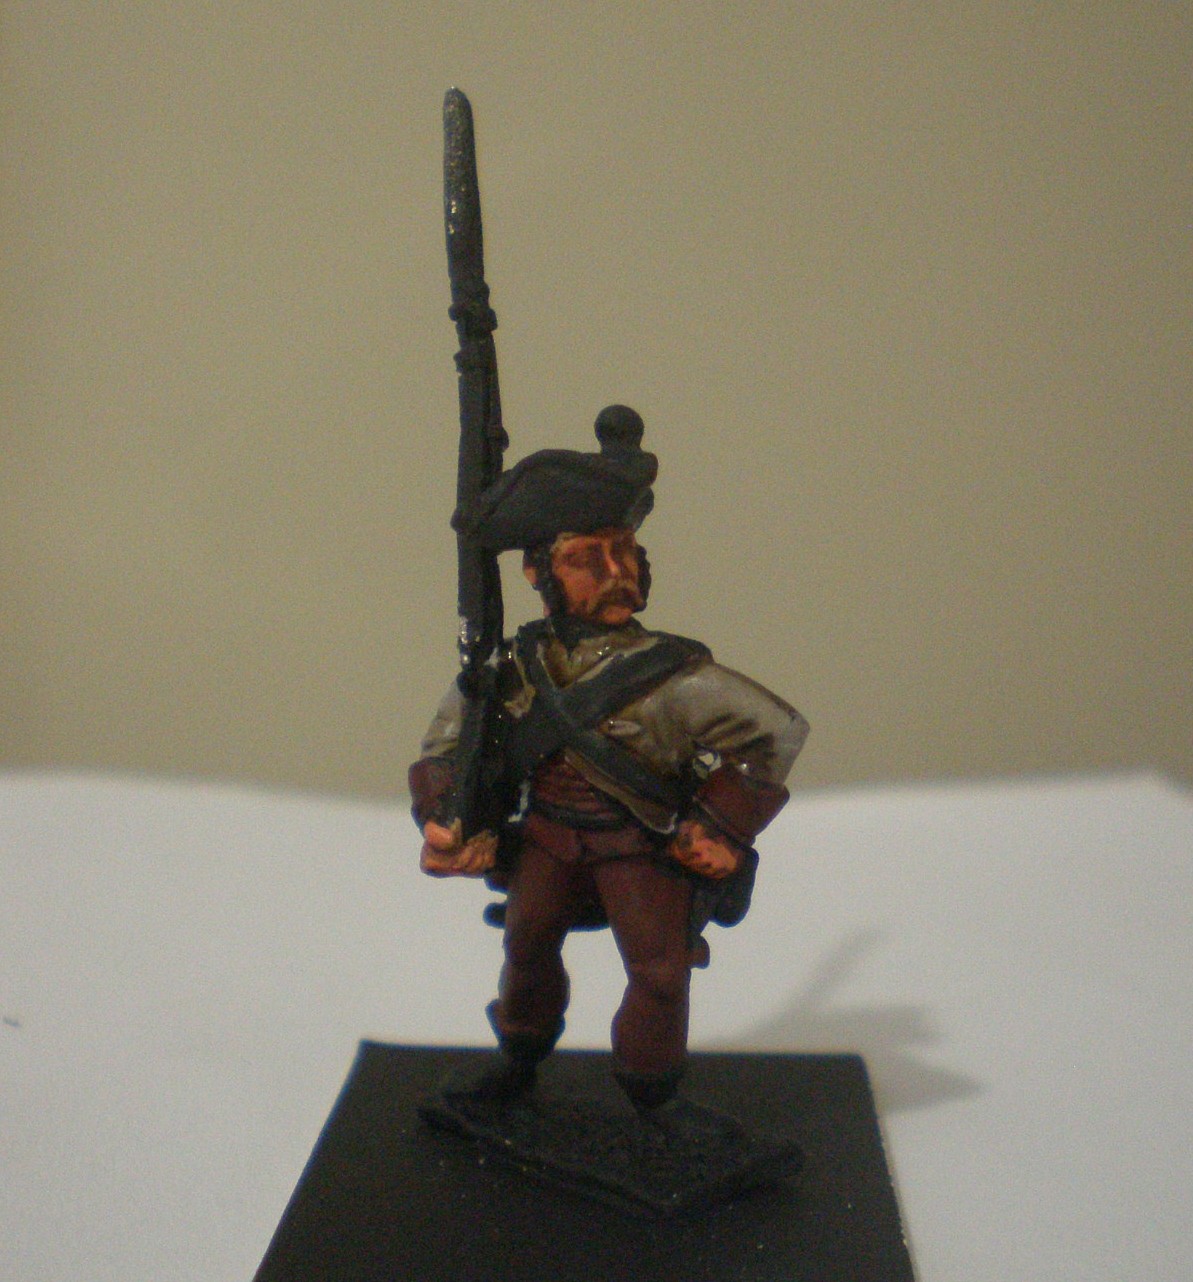
 Photo 11. the Officer coat first layer wastecoat dark brown it should be burnt umber

Photo12. Second layer bestial brown leave small amounts of first layer lace is
 German camo green
sword bolt gun metal, shining gold

Photo13. Here we now add Calthan brown wood grain the hair has second layer as explained above
bolt gun metal on gun barrel
 Photo 14. water bottle bestial brown
the other pack was base coated in burnt umber and then painted with english uniform
 boots are burnt umber Also before basing i've painted the final coat of skin which is dwalf flesh once again only the nose cheek bones and chin and if no mustach upper lip.


 All black has shading on it which is German grey 

 And here we are finished
If you have any question i will try to answer them. Happy painting

Monday, January 24, 2011

Austrian command based and finished

I finished these a few moments ago. doesn't look like i'll get a lot of time to paint this week.
A box of Flames of war stugs turned up today now i have three boxes of tanks to put together and paint oh what fun. I was going to use the mid to late war spray but they are out of stock so back to the paint brush.

28mm Austrian light infantry based and finished


I've really enjoyed painting these fellas they came out nice and colourful and will hopefully add a bright spot amoungst all that white.


Sunday, January 23, 2011

Austrian command Front rank figures almost finished

 I started these boys last night based them this afternoon and just realised i haven't done the last coat of flesh on both Generals with their hands in the air. So will do that tomorrow when the base is dry. tonight i'm finishing the basing for the infantry. This is the second set of command figures of this commission. I have two cav and four infantry left to go then on to the Hanovarioans which i'm looking forward to.

Saturday, January 22, 2011

28mm Austrians started basing

 well finished these guys up today cut the bases and based them up ready to finish up tomorrow.
I think i'll start work on the three generals tonight and the next 24 figures I'll start tomorrow
I'm really pleased with the way these guys came out, I have another 24 of them to do but i think i've found a real nice red uniform in which to do them.


 I'll do a final check to make sure i haven't missed anything before i put the grasses on tomorrow


Friday, January 21, 2011

this weeks progress Austrians syw Carlstadt Szluiner infantry

Click on pictures to enlarge
 This week i started the light infantry of Reg's Austrian army, it has been slow progress as i haven't had a lot of time to paint busy with family. I have a wedding to go to but am hoping to get a bit done before i go then hopefully finish them tomorrow sometime then i need to do 3 gennerals before they are sent away. so here's some progress pictures. I have been taking pictures at every stage and will post a how to paint these guys next week.


As you can see i still have the shading on the black a last coat of skin highlight and wood grain on all guns and walking stick, the belt around the waste and bag and water bottle on back of figures. I done the first coat of hair one highlight to go


 the blue has three coats to give a good depth of colour


Monday, January 17, 2011

28mm wild west town setup so far

 As i said in my previuos post I have my first wild west game down the club this week with my own setup so i decided to do a setup to see if i have enough to set out a town I still want to do another two or three buildings and a mine setup as weel but i think there's enough now to get the feel of a town.. So here's a couple of pics for you let me know if you have any ideas that might help me with all this. As you can see still a lot of work to do .


Couple of fun shots, couldn't help myself